[NextJS] Redirects & Rewrites 사용해 실제 API와 Key 숨기기 (feat. next.config.js & .env)
소스 코드 보러가기 👉🏻 https://github.com/gitchan-Study/2023-next-js-beginner
GitHub - gitchan-Study/2023-next-js-beginner: 노마드코더 [NextJS 시작하기] 학습 코드
노마드코더 [NextJS 시작하기] 학습 코드. Contribute to gitchan-Study/2023-next-js-beginner development by creating an account on GitHub.
github.com
💋 Redirects 설정하기
Next.js에서 프로젝트 디렉터리의 루트(package.json 옆)에 next.config.js 또는 next.config.mjs 파일을 만들어 커스텀 설정을 할 수 있다.
next.config.js는 JSON 파일이 아닌 일반 Node.js 모듈이라고 생각하면 된다.
아래와 같이 module.exports에 redirect 옵션을 아래와 같이 추가하면 /blog 로 접근했을 때, https://engineerinsight.tistory.com 으로 Redirect되는 것을 확인할 수 있다.
next.config.js
/** @type {import('next').NextConfig} */
const nextConfig = {
	reactStrictMode: true,
}

module.exports = {
	reactStrictMode: true,
	async redirects() {
		return [
			{
				source: "/blog",
				destination: "https://engineerinsight.tistory.com",
				permanent: false
			}
		]
	}
}
source: request 경로 패턴destination: redirect할 경로permanent:true인 경우 클라이언트와 search 엔진에 redirect를 영구적으로 cache하도록 지시하는308 status code를 사용하고,false인 경우 일시적이고 cache되지 않은307 status code를 사용한다.
위에서 말한 것처럼 source는 정확한 경로가 아니라, 패턴을 작성해도 되기 때문에 아래와 같이 작성할 수도 있다.
{
  source: '/old-blog/:path*',
  destination: '/blog/:path*',
  permanent: false
}
이 경우에, /old-blog/12332/comments/21323 로 접근하면, /blog/12332/comments/21323 로 redirect된다.
💋 Rewrites 설정하기
Rewirtes를 설정하면, 유저는 redirect되지만 URL은 변하지 않게 된다.
Rewrites은 URL 프록시 역할을 하고 destination 경로를 숨겨 사용자가 사이트에서 위치를 변경하지 않은 것처럼 보이게 한다.
✔️ Before
기존에는, fetch 안에서, 직접 ㄹㅇ API를 호출했다.
pages/index.js
import Seo from "@/components/Seo";
import {useEffect, useState} from "react";

const API_KEY = "4aef0fxxxxxxxxxxxxxxxxxxxxxxx";


export default function Home() {
	const [movies, setMovies] = useState();
	useEffect(() => {
		(async () => {
			const {results} = await (
				await fetch(
					`https://api.themoviedb.org/3/movie/popular?api_key=${API_KEY}`
				)
			).json();
			setMovies(results);
		})();
	}, []);

	return (
		<div>
			<Seo title="Home"/>
			{!movies && <h4>Loading...</h4>}
			{movies?.map((movie) => (
				<div key={movie.id}>
					<h4>{movie.original_title}</h4>
				</div>
			))}
		</div>
	);
}
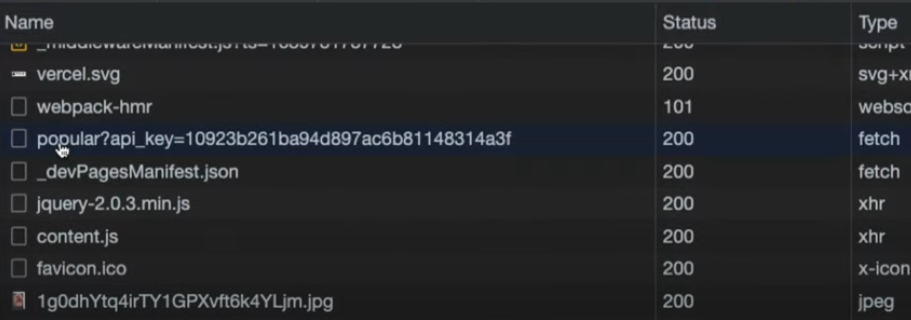
이렇게 했을 때, 개발자도구의 Network 탭에 들어갔을 때 내 API key가 다 까발려질 수 있다.
✔️ After
API 자체도 숨김하고, 코드 내에서 API Key를 직접 노출하지 않도록 env 파일을 도입했다.
먼저, dotenv를 설치하고, 루트에 .env 이름의 파일을 만들어서 실제 api key를 넣어둔다.
npm i dotenv
.env
API_KEY=4aef0fxxxxxxxxxxxxxxxxxxxxxxx
github에 안 올라가도록 .env를 깃 ignore에 추가한다.
.gitignore
.env
이제, 기존에 쓰던 설정파일에 env 파일의 상수를 넣어주고, 실제 API를 숨기기 위해서 노출용 API로 /api/movies 를 설정한다.
next.config.js
const {API_KEY} = process.env;

module.exports = {
	reactStrictMode: true,
	async rewrites() {
		return [
			{
				source: "/api/movies",
				destination: `https://api.themoviedb.org/3/movie/popular?api_key=${API_KEY}`
			}
		]
	},
}
왜인지 모르겠는데, 나는 기존에 있던 설정 중에 Strict Mode를 지워야만 제대로 .env 파일의 내용을 읽어올 수 있었다.
pages/index.js
import Seo from "@/components/Seo";
import {useEffect, useState} from "react";

export default function Home() {
	const [movies, setMovies] = useState();
	useEffect(() => {
		(async () => {
			const {results} = await (
				await fetch(
					`/api/movies` // rewrite에서 설정한 source로 변경
				)
			).json();
			setMovies(results);
		})();
	}, []);

	return (
		<div>
			<Seo title="Home"/>
			{!movies && <h4>Loading...</h4>}
			{movies?.map((movie) => (
				<div key={movie.id}>
					<h4>{movie.original_title}</h4>
				</div>
			))}
		</div>
	);
}
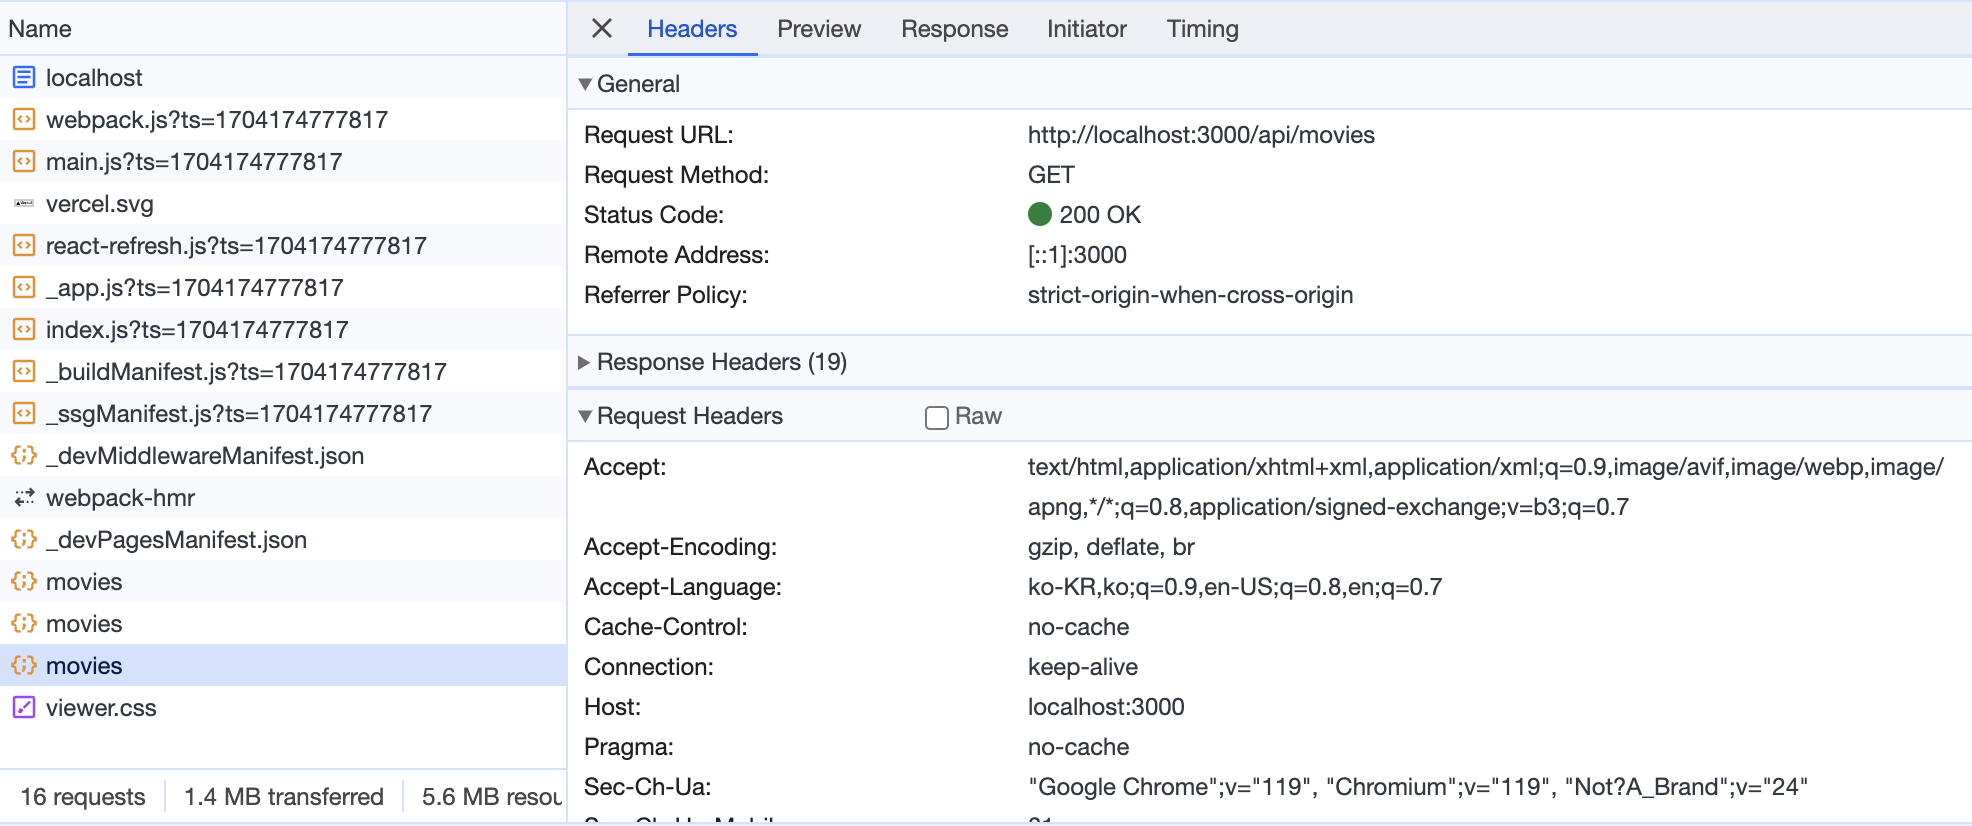
이렇게 진짜 API는 서버 뒤에 Mask(숨김) 처리된다.
진짜 API도 숨기고, 깃허브에서 api key도 노출하지 않을 수 있다!
💋 참고자료
- https://nextjs.org/docs/api-reference/next.config.js/redirects
- https://nextjs.org/docs/pages/api-reference/next-config-js/rewrites

도움이 되었다면, 공감/댓글을 달아주면 깃짱에게 큰 힘이 됩니다!🌟
비밀댓글과 메일을 통해 오는 개인적인 질문은 받지 않고 있습니다. 꼭 공개댓글로 남겨주세요!